この記事の日本語版はこちら
Hello my name is Alfonso. A new member of Kashika.
In this space, I will try to keep you updated about the latests technolgies on AI and Computer Graphics.
Today, I will talk about you about Instant-NGP.
What is NERF ?
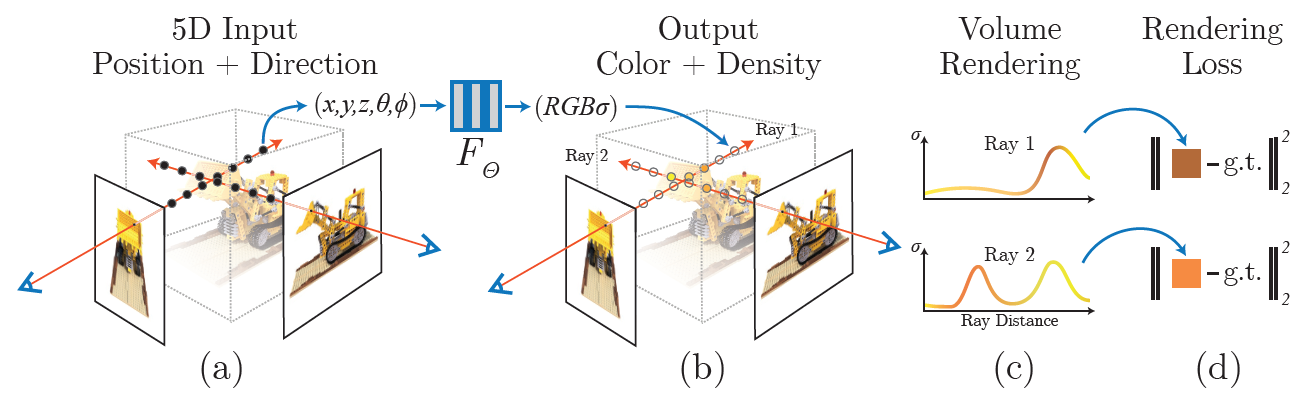
NeRF is the acronym from Neural Radiance Fields for View Synthesis. It is a new AI based randering technique developed in UC Berkley. This new technique is based on a deep neural network that uses as input a set of images with know camera poses. The set of images and camera poses is a seen as a 5D coordiante input set: the 3D coordinates (x,y,z) and the camera viewing direction (thetha, phi). The output of the network will be a volume density that depend on the radiance and the location of the object, that are traced using volume rendering techniques.
In simple terms, NeRF can be imagined like an AI tool that produce a volume/randiance render that depends on the viewing perspective of the input photos. You can image it as if many people where looking to an object from many different angles, then NeRF uses the “neural information” of each people to create the object itself.
Instant-NGP
Instant-NGP (Instant Neual Graphics Primitives) is an optimized version of NERF, that can train a model in less than 5 seconds!.
Instant-NGP uses a multiresolution hash table to make the architecture of the network easier to paralellize, that is why is so fast. We are going to use that to make our render.
Instant_NGP Input - Taking photos
The photos can be taken using a smartphone or a photographic camera. The higher the resolution the better.
It is very important that the object’s photos are taken from different angles and perspectives.
If you take only frontal pictures, Instant_NGP will not have enough information to render the volume of the object and the model may never appear in the rendering.
Also, the number of photos is important. Take a large number of images is not necessary. So, we suggest between 10 to 30 photos, but this may change depending on the object. You just need enough pictures to cover the object. If you take an excesive number of pictures, the estimation of the camera positions may become slow, difficult and may genearate cameras with bad perspectives.
Additionally, the images should have shared perspective of the object. It means that between photos you should be able to see the perpective of another photo. Otherwise the camera positions will be impossible to compute.
Instant-NGP Input - Camera positions and orientation
Besides the photos of the object, the camera position and orientation are extremelly important in Instant-NGP. Even if a single camera is in the wrong position all the render can fail.
So, It is very important to understand how the camera position and orientation are calculated, so we can take the best pictures we can.
To calculate the camera position a program called Colmap is used. Colmap is a software that is used for 3D point cloud reconstruction from 2D images. Altough, it can be also used to triangulate the camera positions using pictures of the same object taken from different perspectives. The heart of Colmap is an algorithm called SIFT (Scale Invariant Feature Transform).
What is SIFT ?
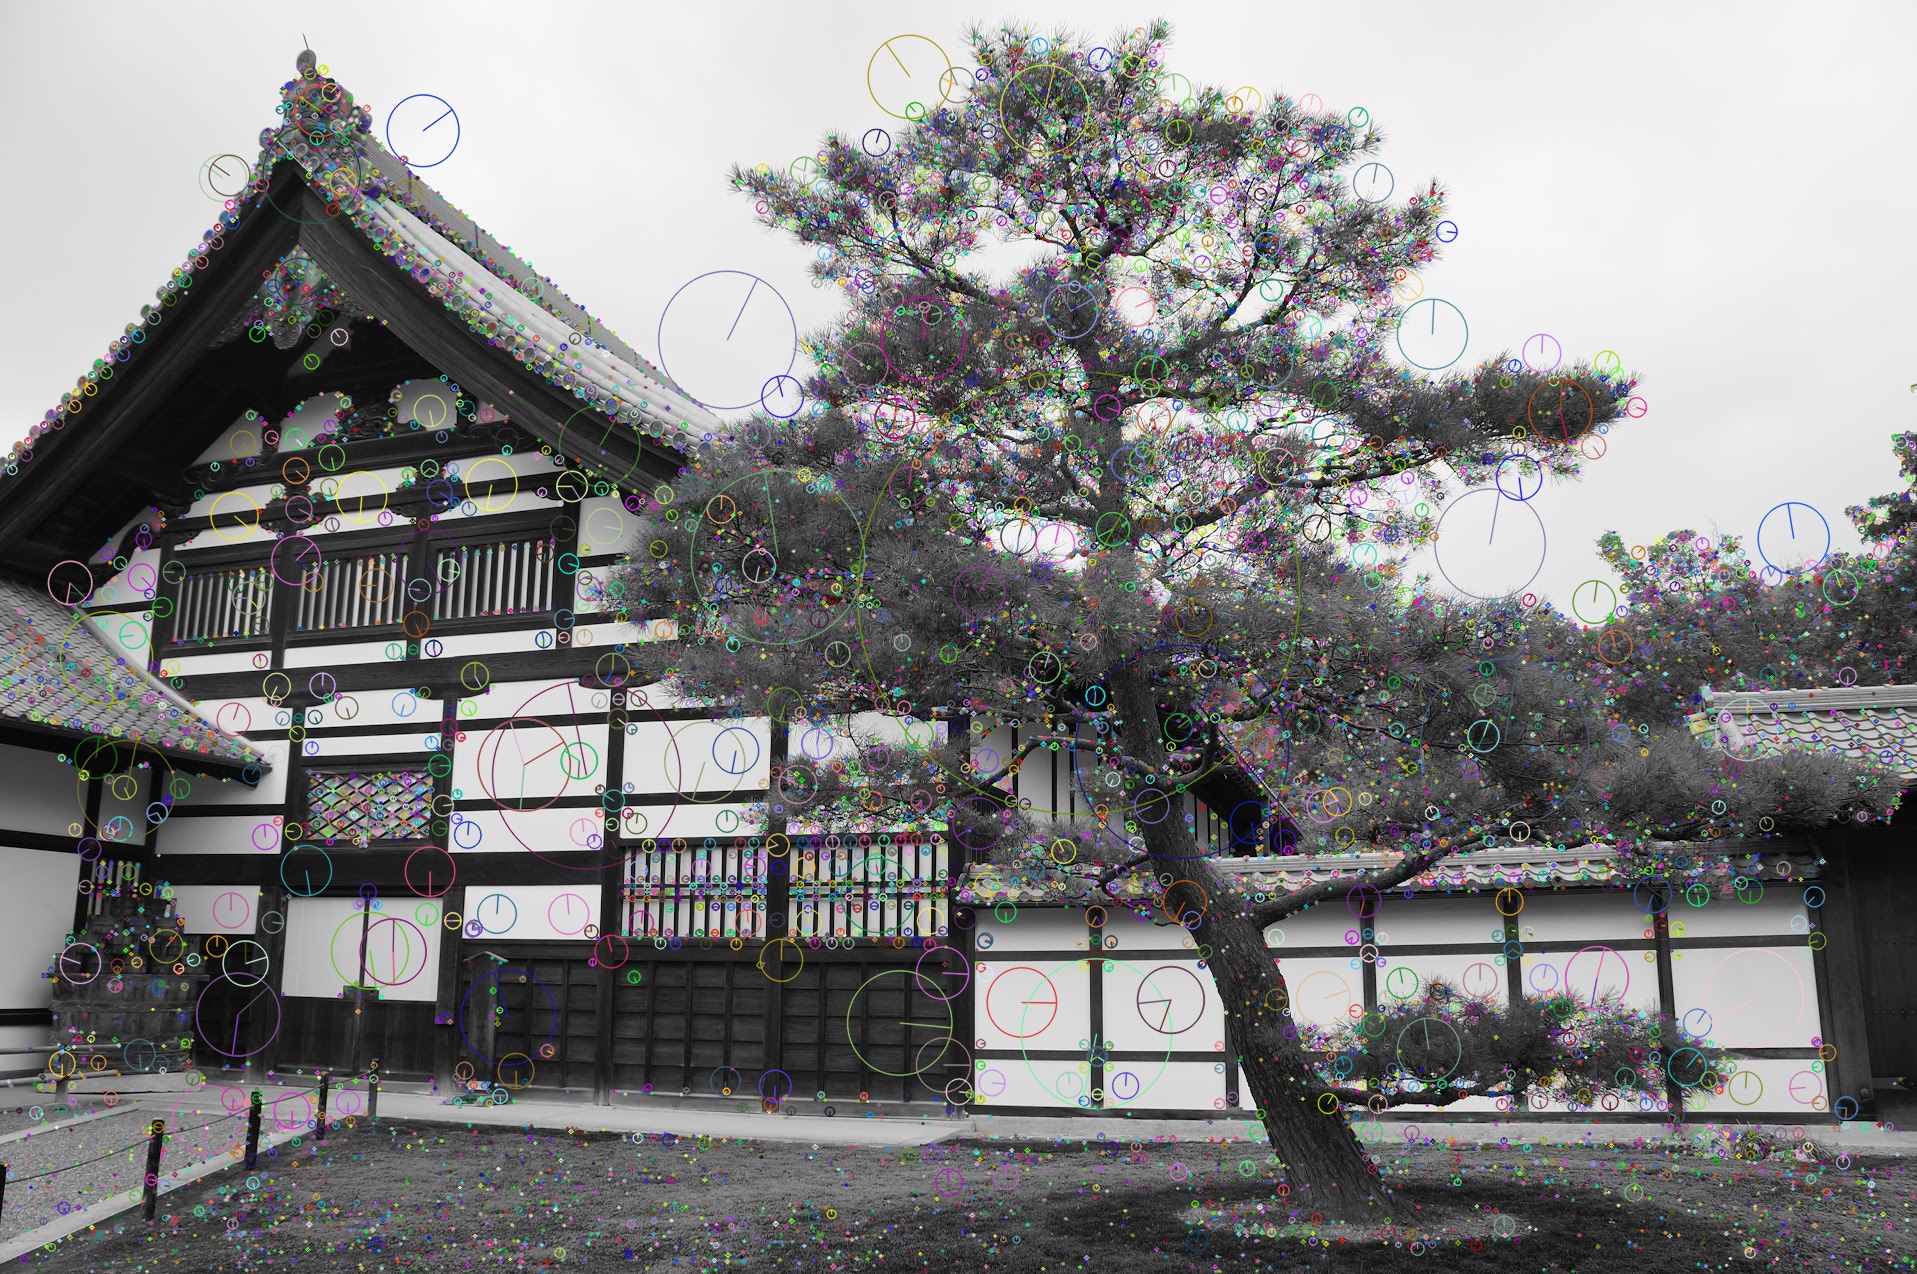
SIFT is a feature detection algorithm, SIFT locates features in an image even if the same object is photographed on a different pespective or if the image change size or rotates. This algorithm is very usefull for 3D reconstruction, stereo vision and photogrametry.
SIFT features are based on the image appearance, since it uses a technique based on border detection, SIFT features are usually parts of the image with high contrast. Like usually object’s borders, corners or tips. SIFT needs images with contrasting borders, corner or tips, otherwise features cannot be extracted. SIFT cannot extract features of images with flat or plain contrast, like: sky clouds, white walls or shinny reflective materials.
Since Colmap uses SIFT, SIFT features are extremelly important in Instant-NGP too. If the images do not have SIFT features Colmap cannot estimate the camera positions or the estimation will be low quality.
So your images must have SIFT features (corners, border or tips). If the object do you want to scan do not have this features, you can place another object with a higher contrast on the background, so Colmap can calculate the camera positions correctly.
Instant-NGP Install
Since Instant-NGP is very new, the only way to install Instant-NGP in your PC is from source code. Altough this can be frightening for inexperienced users. There are several tutorials that show you how to install NERF step by step.
Here are some links:
https://lilea.net/lab/how-to-setup-instant-ngp/ (in Japanese)
https://www.youtube.com/watchv=kq9xlvz73Rg (in English)
We are working basic Instant-NGP install tutorial too, comming soon… ;)
Colmap install and use
To calculate the camera positions is necessary to use a program called Colmap and a script included in Instant-NGP source code.
First you need to install Colmap 3.7 from here . (install COLMAP-3.7-windows-cuda.zip ). After installing Colmap, add Colmap’s installation dir to your PATH environment variable.
Then to install the NeRF-Colmap script you must install Anaconda.
Once installed, open an Anaconda prompt (as Administrator) and go to Instant-NGP installation folder (instant-gp)
Then execute the following commands:
conda create -n ngp python=3.9
conda activate ngp
pip install -r requirements.txt
(You may need to change the Python version )
Once installed you must put your images inside Instant-NGP’s data folder, under: <data/nerf/your_image_set_name>
Finally, to compute the camera positions execute the following command (inside Instant-NGP install folder):
python scripts\colmap2nerf.py --colmap_matcher exhaustive --run_colmap --aabb_scale 1 --images <data\nerf\your_image_set_name>
This command should generate a JSON file named transforms.json that should be inside Instant-NGP’s install folder.
Then copy transforms.json to inside your image data folder. And then run Instant-NGP using the following command:
.\build\testbed.exe --scene <data\nerf\your_image_set_name>\transforms.json
Colmap camera debug.
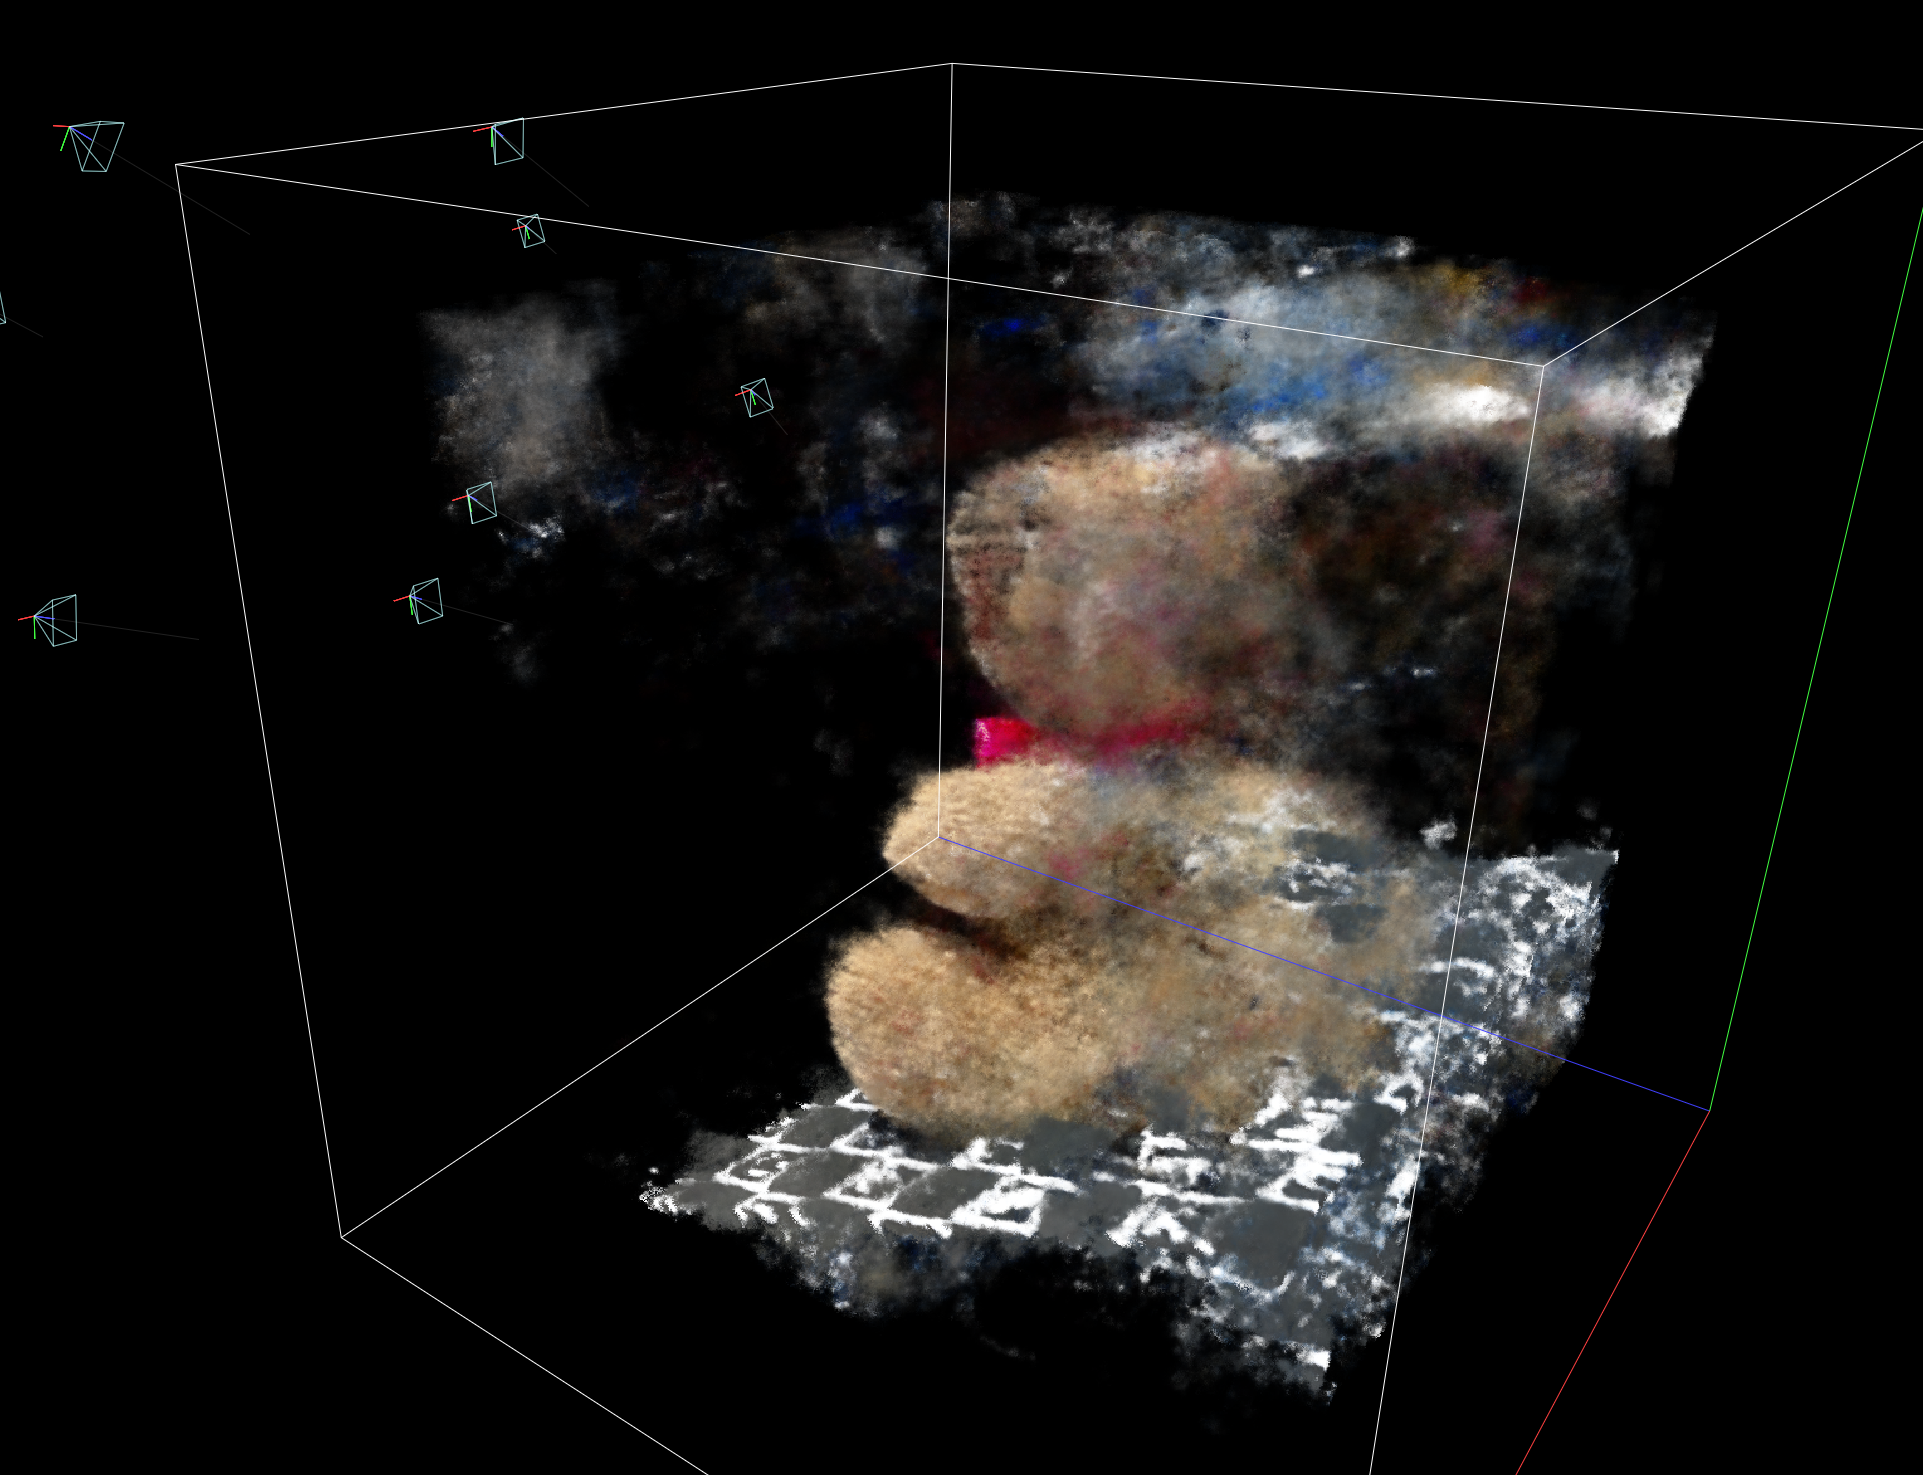
Altough Colmap is very handy is not perfect. Sometimes, Colmap will generate cameras with bad orientation.
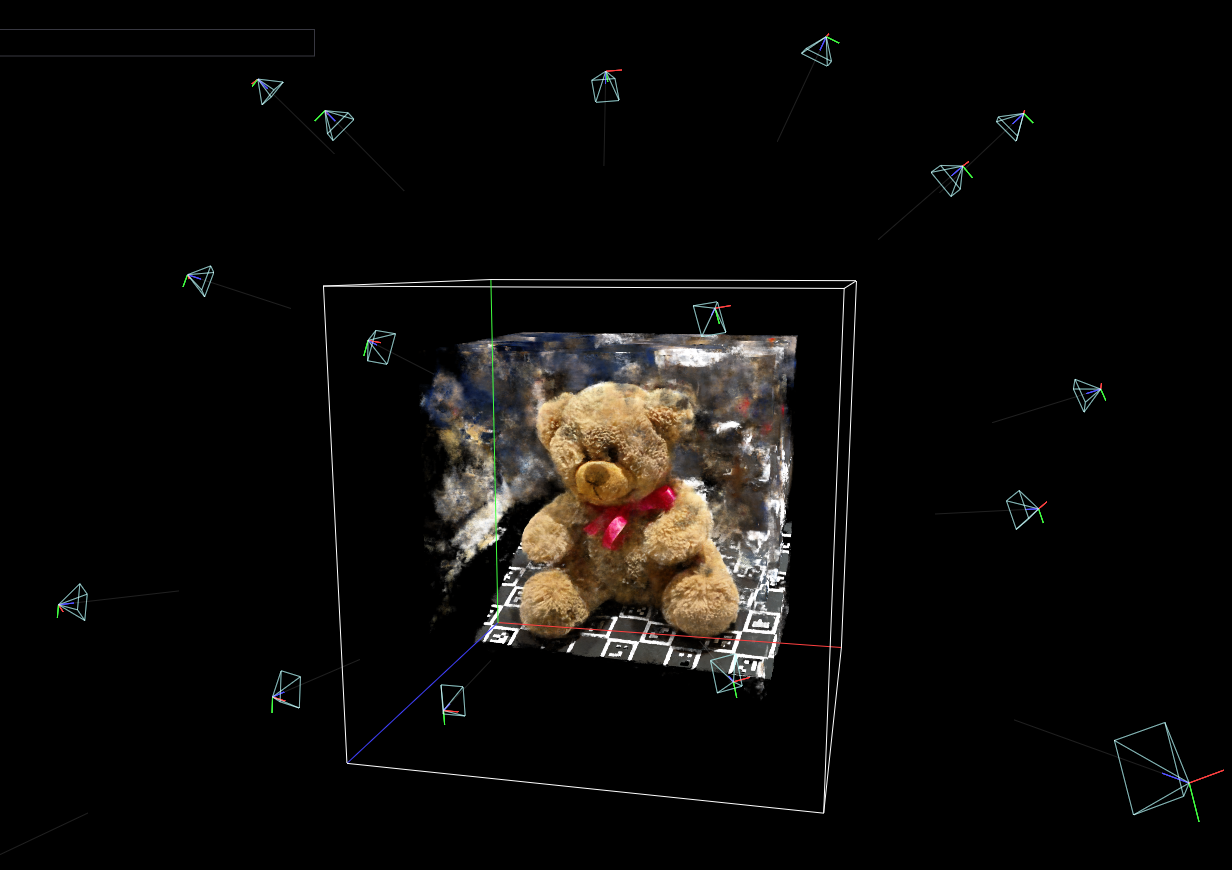
To solve the problem, is necessary to check the cameras point of view. To detect a bad camera just check if the Instant-NGP projection creates a shadow or ghost object, if so write down the number of the camera and delete it manually from the JSON.
Conclusion

Now you generally understand how NERF technology works (Instant-NGP) and what is the input data.
In resume, you just need to take a good number of pictures (more than 10, less than 30) from different perspectives with lots of SIFT features (corners, angle, rugosities etc ) This, will garantee you a good quality and quick Instant-NGP render.